Guides
How to Read a Hydrometer
A hydrometer is calibrated to read accurately at one specific temperature, commonly 60 degrees Fahrenheit, and a sample taken about 20 degrees above that calibration point reads roughly 2 gravity points low until it is corrected.
The fix is either to cool the sample down to the calibration temperature before reading it, or to run the actual sample temperature through a hydrometer correction calculator rather than trusting the raw number.
What "calibrated at a stated temperature" actually means
Every hydrometer is built and printed to read accurately at one specific temperature, and that temperature is usually printed somewhere on the instrument itself or in its packaging. A commonly used calibration point is 60 degrees Fahrenheit, though it is not universal, so it is worth checking your specific hydrometer rather than assuming. Reading a sample at any temperature other than that calibration point produces a number that is simply wrong until it is corrected, not a close approximation that is good enough to use as-is.
This happens because liquid density itself changes with temperature: warmer liquid is less dense and a hydrometer floats lower in it than it would at the calibration temperature, which reads as a lower gravity than the sample actually has. A sample roughly 20 degrees above the calibration point reads about 2 gravity points low as a result, a real and meaningful gap if you are trying to calculate ABV or decide whether fermentation has actually finished.
Reading the meniscus correctly
A hydrometer needs to float freely in a sample deep enough that it does not touch the bottom or sides of the container, which is why a proper test jar matters as much as the hydrometer itself. Give the hydrometer a light spin when you drop it in to knock off any clinging bubbles, which can otherwise throw the reading off. Read the scale at eye level rather than looking down at it from above, since reading from an angle is a common source of small errors that have nothing to do with temperature.
The liquid surface forms a slight curve, called the meniscus, where it meets the hydrometer stem, and different hydrometers are printed with instructions for reading either the top or the bottom of that curve. Check the instructions that came with your specific hydrometer rather than assuming, and once you know which line to read, stay consistent about it every time so your own readings are comparable batch to batch.
What different scales actually tell you
| Scale | What it measures | Typical use | Temperature sensitive? |
|---|---|---|---|
| Specific gravity | Density of dissolved sugars relative to water | Tracking fermentation from original to final gravity | Yes, needs correction if sample is off calibration temperature |
| Brix | Sugar concentration, refractometer scale | Quick check before or early in fermentation | Most refractometers include automatic temperature compensation |
| Potential alcohol | Rough estimate assuming full attenuation | A quick glance at expected finishing strength | Same correction issue as the specific gravity scale it is derived from |
Why one reading never proves fermentation is done
A single hydrometer reading tells you where gravity stands at that exact moment, nothing more. Fermentation can appear to slow or even pause temporarily and then continue dropping, which is why a reading taken once and treated as final can lead to bottling a beer, cider, or mead that has not actually finished. The only reliable confirmation is taking readings on separate days and seeing the exact same number come back across several consecutive checks.
This matters most right before packaging, since bottling or kegging based on a calendar guess rather than a confirmed stable reading is one of the more common ways home fermented beverages end up over-carbonated or, in a sealed bottle, dangerously over-pressured. A stable reading across several days is the real standard to work from, not attenuation percentage or a set number of weeks.
Refractometer versus hydrometer during active fermentation
A refractometer only needs a couple of drops of sample and gives a fast reading, which makes it convenient for checking pre-boil or pre-fermentation gravity without sacrificing a large sample. Once alcohol is present in the liquid, though, a refractometer reads inaccurately unless the result is run through a specific correction formula, since alcohol bends light differently than the sugars the refractometer was calibrated against. A hydrometer does not have this limitation and remains accurate mid-fermentation and at final gravity as long as the sample is at or corrected to its calibration temperature.
A practical approach many brewers use is a refractometer for quick pre-fermentation checks, where its speed and small sample size are most useful, and a hydrometer for tracking gravity once fermentation is underway and for the final stable-reading check before packaging.
Wireless loggers and continuous tracking
Wireless hydrometer loggers sit inside the fermenter and report gravity and temperature readings automatically over time, which removes the need to open the fermenter and pull a sample for every check. This is convenient for watching a trend over several days without repeated manual sampling, though the same temperature-calibration principle still applies underneath: a logger reporting gravity at a temperature away from its calibration point still needs that temperature accounted for, which most of these devices handle automatically as part of their reported reading.
The tradeoff is that a wireless logger reads gravity through the fermenting liquid itself, without pulling a separate sample the way a manual hydrometer or refractometer check does, so it cannot be used interchangeably with a pulled sample without expecting some difference in the exact number reported. Many brewers use a logger for the general trend, watching gravity fall and then flatten over several days, and confirm the actual finishing number with a manual hydrometer reading in a test jar before deciding a batch is ready to package.
Choosing a test jar that actually works
A hydrometer needs enough depth to float freely without the bulb touching the bottom or the stem rubbing against the sides, so a proper test jar matters as much as the hydrometer itself. A jar that is too narrow makes the hydrometer bind against the walls, which throws off the reading and makes it hard to get the hydrometer level enough to read accurately in the first place. A jar that is too shallow risks the hydrometer bottoming out before it settles, especially with a denser, higher-gravity sample.
A dedicated glass test jar built specifically for hydrometer use is a low-cost purchase that removes this guesswork entirely, and many come with a small brush sized to clean the narrow cylinder afterward, since a test jar needs the same cleaning and sanitising attention as any other piece of equipment that touches wort or beer before it goes back into service for the next reading.
Pulling a sample without contaminating the batch
Every gravity check means opening the fermenter and removing some liquid, both of which are moments where contamination can get in if you are not careful. Sanitise the wine thief, turkey baster, or valve you use to pull the sample, along with the test jar it goes into, exactly the way you would sanitise anything else that touches the batch. Pulling the sample quickly and closing the fermenter back up promptly limits how long it sits open to the air, which matters more the more often you are checking gravity during active fermentation.
Once you have poured the sample into a test jar and taken a reading, do not pour it back into the fermenter. The sample has been exposed to air and handled outside a sealed, sanitised environment, and pouring it back reintroduces exactly the contamination risk the sanitising step was meant to prevent, along with unnecessary oxygen at a stage where oxidation is already a concern. A small amount of lost volume from each check is a normal and acceptable cost of tracking gravity properly, far cheaper than risking the whole batch to save an ounce or two of liquid.
Reading gravity as a trend, not a single number
Gravity readings are most useful when you take more than one and compare them against each other rather than treating any single reading as the full story. An original gravity reading taken right after pitching yeast establishes the starting point, and readings taken over the following days and weeks show how far fermentation has progressed relative to that starting point. Watching the trend, gravity dropping steadily and then leveling off, tells you far more about where a batch actually stands than any one reading taken in isolation.
This is also why writing readings down, with the date and the corrected value if a correction was needed, matters more than it might seem for a simple number. A logbook of readings across a batch, and across several batches over time, builds a much clearer picture of how your specific yeast strains and recipes typically behave than trying to remember or estimate from a single number weeks after the fact.
Everything else worth considering
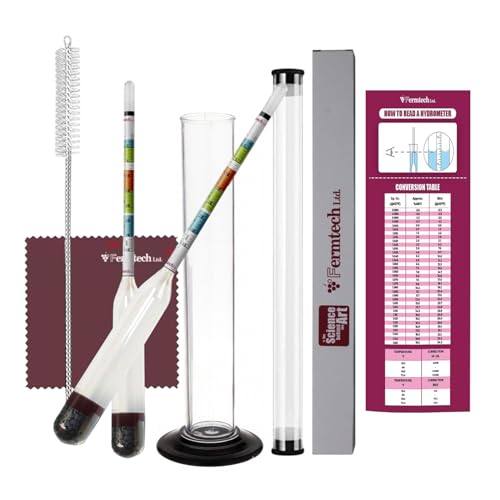
Fermtech Glass Triple Scale Hydrometer Kit
Triple scale glass hydrometer for beer, wine, mead and cider.
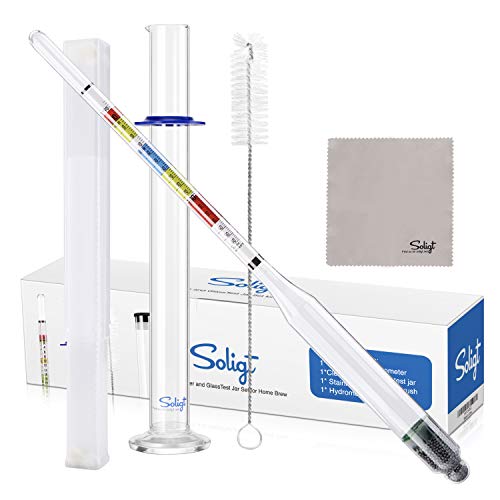
SOLIGT Triple Scale Hydrometer with Glass Test Jar
Hydrometer reading ABV, Brix and specific gravity, supplied with a glass jar.

Brewer's Elite Hydrometer and Test Jar
Triple scale hydrometer with a plastic test jar. Stable gravity on this instrument is the only real proof fermentation has finished.

Fermentaholics Hydrometer Test Jar
Measuring cylinder for taking a gravity sample without dropping the hydrometer into the fermenter.

Brewing America Glass Hydrometer Test Jar with Brush
Narrow glass flask and cleaning brush, which reads more accurately than a wide vessel.
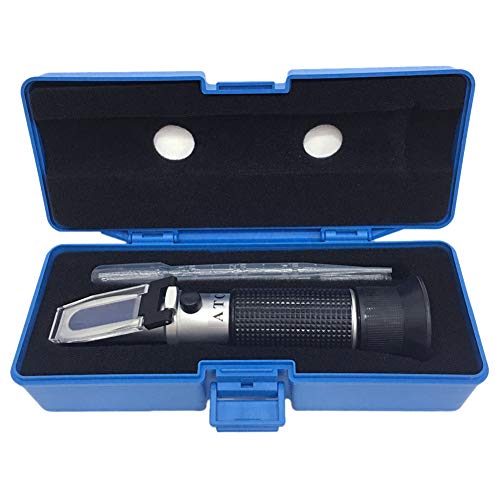
aichose Brix Refractometer with ATC (dual scale)
Dual scale Brix and specific gravity refractometer with automatic temperature compensation, which needs only two drops of wort.

Ade Advanced Optics Beer Wort Refractometer
Dual scale refractometer reading specific gravity 1.000 to 1.120 and Brix, built for wort rather than fruit.

Tilt Wireless Hydrometer and Thermometer
A floating sensor that reports gravity and temperature over Bluetooth, so you can confirm stable gravity without opening the fermenter.
Related on BrewGearCalc
- Hydrometer correction calculator
- Refractometer calculator
- ABV calculator
- Your first cider batch
- Your first mead batch
Frequently asked questions
- What temperature should my hydrometer sample be for an accurate reading?
- Whatever temperature your specific hydrometer is calibrated for, which is commonly 60 degrees Fahrenheit but is not universal across every hydrometer. Check the instrument or its packaging for the exact stamped calibration temperature rather than assuming, and either cool your sample to that temperature before reading or correct the reading mathematically for the actual sample temperature.
- Why does my hydrometer read differently warm versus cold?
- Liquid density changes with temperature, so a warm sample is less dense than the same liquid at the calibration temperature, which makes the hydrometer float lower and read a lower gravity than the sample actually has. A sample around 20 degrees above calibration temperature reads roughly 2 gravity points low, which is enough to throw off ABV calculations if it is not corrected.
- Do I read the top or bottom of the meniscus?
- It depends on the specific hydrometer, since manufacturers print instructions for reading either the top or the bottom of the curved liquid surface where it meets the stem. Check the instructions that came with your hydrometer, then stay consistent about which line you read every time so your own readings are comparable from batch to batch.
- Can one hydrometer reading tell me fermentation is finished?
- No. A single reading only shows where gravity stands at that exact moment, and fermentation can appear to pause and then continue dropping. The only reliable confirmation is the same reading showing up across several consecutive days. Bottling or kegging based on a single reading or a calendar guess risks packaging a beverage before fermentation has actually finished.
- Is a refractometer more accurate than a hydrometer?
- Before fermentation starts, a refractometer is fast and accurate with just a couple of drops of sample. Once alcohol is present, though, it reads inaccurately unless the result is run through a specific correction formula, since alcohol bends light differently than sugar does. A hydrometer stays accurate throughout fermentation as long as the sample is at or corrected to its calibration temperature.
- How do I correct a warm hydrometer reading?
- Enter the actual sample temperature and your hydrometer's calibration temperature into a hydrometer correction calculator, which adjusts the raw reading for the difference between the two. The alternative is cooling the sample down to the calibration temperature before reading it directly, which avoids needing a correction at all but takes more time.
Researched from published brewing formulas, manufacturer specifications and verified owner reviews. This is general guidance, not professional advice.