Guides
Your First Mead Batch
Mead ferments from honey and water with no mash and no boil required, but because honey carries almost none of the nutrients yeast need to work efficiently, a proper yeast nutrient addition is a real requirement, not an optional extra.
A one gallon kit such as the Craft A Brew Mead Making Kit is a realistic first batch size, and mead is genuinely slow: expect months, not weeks, between pitching yeast and a mead that is ready to bottle or age.
What mead needs, and what it skips
Mead is fermented honey and water, and like cider it skips the entire conversion step that defines beer brewing. There is no starch to mash and nothing that needs a full rolling boil the way a beer wort does. A kettle, mash tun, or propane burner from an all-grain setup has no real role in making mead. Some mead recipes call for gently warming water to help dissolve honey more easily, but that is a mild heating step, not a boil, and it is optional rather than a defining part of the process.
What mead genuinely needs is a sanitised fermenter with an airlock, honey and water in the right ratio for the target gravity, a suitable yeast, and yeast nutrient. That last item is the one beginners moving over from beer or cider brewing most often skip, and it is the one that actually matters most for mead specifically.
Why yeast nutrient is not optional here
Malted grain used in beer carries a range of nutrients yeast need beyond simple sugar, things like amino acids and micronutrients that support healthy fermentation. Honey is nutritionally almost empty by comparison. It is close to pure sugar with very little of what yeast actually needs to reproduce and ferment cleanly, so a mead made from honey and water alone, with no nutrient addition, commonly stalls partway through, finishes with unwanted off flavors, or both. This is a genuine, well-established difference between mead and other home-fermented beverages, not a minor preference.
The catalog behind this site does not currently carry a standalone yeast nutrient product, which is a real gap worth stating plainly rather than pointing you toward something that is not actually nutrient. Packaged mead kits typically include a nutrient addition sized for their specific batch volume, which covers a first batch made from a kit. Scaling up to a larger batch on your own will mean sourcing yeast nutrient from a homebrew shop separately, since it is not something to skip or substitute out of convenience.
Comparing starter kits
| Kit | What it centers on | Best for |
|---|---|---|
| Craft A Brew Mead Making Kit | One gallon batch, core equipment included | A first mead batch with minimal upfront commitment |
| FastRack Shepherd Made Mead Making Kit | Compact, budget-friendly format | A low-cost small first attempt |
| Craft A Brew Deluxe Mead Making Kit | Expanded equipment set | A brewer who wants more gear included from the start |
| Blue Ox Deluxe Mead Making Kit | Larger, fuller equipment set | Scaling up once a first small batch has gone well |
Yeast for mead, and another honest gap
Traditional mead makers often reach for a wine yeast strain built for high-gravity, sugar-heavy fermentations, since mead musts can run considerably higher in starting gravity than a typical beer wort. The catalog behind this site is built around ale yeast strains rather than dedicated wine or mead yeast, so a first-time mead maker starting from scratch here should lean on the yeast packet included with a packaged mead kit, which is already matched to that kit's specific recipe and gravity, rather than assuming any ale yeast is an equivalent substitute for every mead recipe.
Why mead is slow
Mead earns its reputation for patience honestly. Primary fermentation itself can take longer than a typical beer or cider simply because honey must sits through a nutrient-poor environment even with proper nutrient additions, and higher starting gravity recipes ask yeast to work harder and longer to reach a stable finishing gravity. Beyond primary fermentation, mead commonly benefits from extended aging, often measured in months, that smooths out sharper, hotter notes present in a young mead into a rounder, more balanced final product.
This is the biggest mental adjustment for a brewer coming from beer, where a batch can go from brew day to a glass in a matter of weeks. A realistic first mead timeline runs from several weeks for primary fermentation to finish, followed by additional months of aging before the mead is at its best. Rushing a young mead to bottle and drink right away is not dangerous, but it usually means missing the flavor a few more months of quiet aging would have delivered.
Racking during a long aging period
Mead spends far more time sitting on sediment than beer or cider typically does, simply because its fermentation and aging timeline runs so much longer, which makes racking, siphoning the mead off the settled yeast layer into a clean, sanitised vessel, more important here than in a faster-finishing beverage. Leaving a mead on a thick bed of dead yeast for months on end risks it picking up unwanted flavors from that yeast slowly breaking down, sometimes described as a stale or rubbery character, well before the mead itself is actually ready.
A common approach is racking once shortly after primary fermentation has clearly finished and gravity has stabilized, then racking again partway through a longer aging period if the batch is going to sit for many months, using an auto siphon each time and stopping well above the settled sediment layer. Each racking also gives you a natural opportunity to taste the mead and take a fresh hydrometer reading before deciding how much longer it needs.
Why backsweetened mead is a bottle bomb waiting to happen
A dry, fully fermented mead is not to everyone's taste, and adding honey back in to sweeten a finished batch before bottling is a common request. It carries exactly the same risk as backsweetening cider: any yeast still present in the mead has new sugar to work with, and if that fermentation restarts inside a sealed bottle, the resulting carbon dioxide has no way out. This is the classic bottle bomb, and mead's slower fermentation timeline does not make it any less real.
The same three safe paths apply here as with cider: stabilize the mead with potassium sorbate together with a metabisulfite such as Campden before backsweetening, which together stop surviving yeast from restarting fermentation on the added honey; pasteurize the finished, sweetened, and bottled mead with gentle heat; or keep a backsweetened mead refrigerated and drink it within a shorter window rather than storing it at room temperature. Skipping all three is how a sweetened mead ends up as a bottle bomb months after it looked perfectly stable.
Bottling and equipment you already have
Mead uses the same siphon, hydrometer, and bottling gear as beer or cider, so a first mead batch does not require buying a separate equipment set beyond a suitable fermenter, an airlock, and yeast nutrient. Still mead can be bottled flat without priming sugar, while a carbonated mead follows the same priming sugar approach used for beer or carbonated cider.
Sizing a first batch and why smaller makes sense
A one gallon batch is a practical starting point for mead specifically because the ingredient cost is higher than a batch of beer or cider of the same volume, since honey costs meaningfully more per pound than malt extract or juice concentrate does. Starting small limits that cost while you confirm you enjoy both the process and the long aging timeline mead asks for, and a small batch is also easier to fit into limited fermenter space over the months a mead spends conditioning.
Once a first small batch has aged out and tasted good, scaling the same recipe up to a 5 gallon batch is mostly a matter of multiplying the honey, water, nutrient, and yeast quantities proportionally, using the same process and the same patience the smaller batch already taught you to expect.
Signs fermentation is progressing normally
A healthy mead fermentation typically shows airlock activity starting within a day or two of pitching, though it can be slower to get going than beer or cider because of honey's thinner nutrient profile, even with nutrient added. Some visible foam or a light layer of fine sediment forming on the surface during active fermentation is normal, and the liquid generally clears gradually as fermentation slows and yeast begins settling toward the bottom of the fermenter.
A mead that shows no airlock activity at all after several days, well beyond what a beer or cider batch would need, is worth checking with a hydrometer rather than assuming it will eventually start on its own. A stalled mead fermentation is more common than a stalled beer fermentation specifically because of honey's nutrient-poor starting point, which is exactly why nutrient additions, and sometimes staggered nutrient additions added in stages rather than all at once, are treated as a real part of the mead process rather than an afterthought.
Everything else worth considering

Craft A Brew Mead Making Kit (1 gallon)
Reusable one gallon mead kit. Mead ferments slowly, so expect months rather than weeks.

Craft A Brew Deluxe Mead Making Kit
One gallon mead starter set including back-sweetening and bottling tools.

FastRack Shepherd Made Mead Making Kit
One gallon jug fermentation set for mead, the cheapest way to try honey wine.

Blue Ox Deluxe Mead Making Kit
Mead kit supplied with storage bottles, a hydrometer and extra yeast nutrient.

TAPCRAFT Campden Tablets (potassium metabisulfite, 50 count)
Removes chlorine and chloramine from tap water, which otherwise produce a medicinal off flavour.
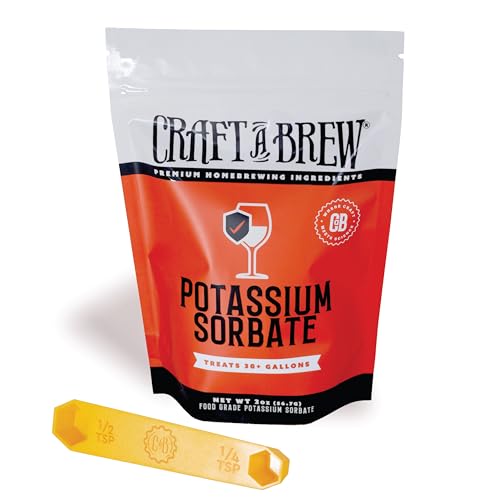
Craft A Brew Potassium Sorbate (2 oz)
Stabiliser used when back-sweetening cider or mead, which prevents the new sugar refermenting in the bottle.
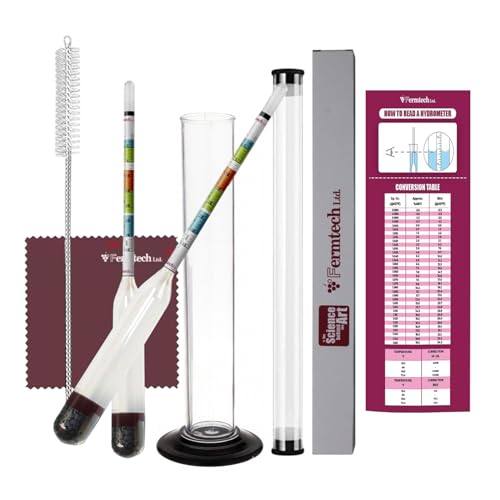
Fermtech Glass Triple Scale Hydrometer Kit
Triple scale glass hydrometer for beer, wine, mead and cider.

FastRack 6.5 Gallon Fermenting Bucket with Lid
Single food grade fermenting bucket with a drilled lid, the cheapest vessel that genuinely works.

Fermtech Mini Auto Siphon with Tubing and Clamp
Short auto siphon sized for one gallon and small batch fermenters.
Before you do this
Backsweetened mead is just as much a bottle bomb risk as backsweetened cider. Adding honey after fermentation gives surviving yeast new sugar to ferment, and sealed glass has nowhere for the resulting carbon dioxide to go. Stabilize with potassium sorbate and a metabisulfite before backsweetening, pasteurize the bottled mead, or keep it refrigerated and drink it quickly, never bottle backsweetened mead at room temperature without one of those steps.
Related on BrewGearCalc
- Your first cider batch
- How to read a hydrometer
- ABV calculator
- Hydrometer correction calculator
- All guides
Frequently asked questions
- Do I need to boil anything to make mead?
- No. Mead is honey dissolved in water and fermented, with no starch to convert and no wort that needs a rolling boil. Some recipes call for gently warming water to help the honey dissolve, but that is a mild optional step, not a boil, and a full brewing kettle or burner is not required for a mead batch.
- Why does mead take so much longer than beer or cider?
- Honey provides very little of the nutrition yeast need beyond raw sugar, and many mead recipes also start at a higher gravity than a typical beer or cider, both of which slow fermentation down even with proper nutrient additions. Beyond that, mead commonly benefits from extended aging, often months, to smooth out sharper notes present in a young batch. Beer can go from brew day to a glass in weeks, mead is a longer commitment.
- Do I really need to add yeast nutrient?
- Yes. Honey is nutritionally close to pure sugar, with very little of what yeast need to reproduce and ferment cleanly, so mead made without nutrient often stalls or finishes with unwanted off flavors. Packaged mead kits typically include a nutrient addition sized for their batch, but a batch built without a kit needs nutrient sourced separately, since it is not something to skip.
- What yeast should I use for mead?
- A yeast packet included with a packaged mead kit is matched to that kit's specific recipe and gravity, which makes it the simplest choice for a first attempt. Traditional mead makers often use a wine yeast built for high-gravity fermentations, which is a different category from the ale yeast strains most home brewing catalogs, including this one, are built around.
- Can I backsweeten my mead before bottling?
- Not safely without stabilizing it first. Adding honey back into a finished mead gives any surviving yeast new sugar to ferment, and if that happens inside a sealed bottle it is a bottle bomb. Stabilize with potassium sorbate plus a metabisulfite before backsweetening, pasteurize the bottled mead afterward, or keep it refrigerated and drink it within a shorter window instead.
- How do I know when my mead is actually finished fermenting?
- Check gravity with a hydrometer across several consecutive days rather than assuming a set number of weeks means it is done, since mead's slower and more variable fermentation timeline makes calendar guessing especially unreliable. A reading that holds steady for a few days in a row is the real confirmation, the same standard that applies to beer and cider.
Researched from published brewing formulas, manufacturer specifications and verified owner reviews. This is general guidance, not professional advice.