Guides
Bottling Day, Step by Step
A standard 5-gallon batch fills about 53 twelve-ounce bottles, and every bottle, cap and tool that touches the beer after the boil needs to be sanitized first.
Priming sugar should be weighed on a gram scale rather than measured by volume, since a dose measured by volume is one of the most common ways a correct calculation turns into an over-carbonated batch.
Before bottling day actually starts
Bottling day should not begin until fermentation has genuinely finished, and the only real proof of that is a hydrometer reading that has not moved across several consecutive days. Attenuation figures from the recipe and the number of days since pitching are both useful planning tools, but neither one proves the yeast is done. Checking gravity on two or three different days, with the readings matching, is what actually confirms it.
Cold crashing before bottling is optional but common, since it drops suspended yeast and haze-forming proteins out of suspension and leaves a clearer beer in the bottle. It is not a substitute for the gravity check above; a beer can look perfectly clear and still be actively fermenting.
Gathering the equipment
A bottling session needs bottles and caps, a capper, a bottling bucket with a spigot, an auto-siphon or racking cane to move beer without splashing, a bottling wand or spring-loaded filler, a small pot for the priming sugar solution, a gram scale, and enough sanitizer to cover every one of those items. Running out of sanitizer partway through a session is one of the more common ways a bottling day goes sideways, so mixing more than seems necessary is worth the few extra minutes.
Bottle choice matters more than it looks. Standard pry-off bottles need caps and a capper rated for that bottle finish, while swing-top bottles use their own built-in gasketed cap and skip the capper entirely. Either style works fine for carbonated beer as long as the bottle itself is rated for pressure and free of chips or cracks, which weaken glass and raise the odds of a failure once carbonation builds.
| Step | What it accomplishes | Key equipment |
|---|---|---|
| Sanitize bottles and equipment | Removes contaminating microbes before beer touches anything | A no-rinse sanitizer, a bottle tree or drying rack |
| Weigh and dissolve priming sugar | Delivers a known, calculated dose of fermentable sugar for carbonation | A gram scale, a small pot for the sugar solution |
| Rack beer onto the priming solution | Mixes the sugar evenly through the batch without splashing | A bottling bucket with a spigot, an auto-siphon |
| Fill bottles | Leaves consistent headspace for a proper seal and carbonation | A bottling wand or spring-loaded filler |
| Cap bottles | Seals in the carbonation as it develops | A bench or hand capper, new caps |
| Store bottles | Lets conditioning finish at the right temperature while containing any failure | A closed box or crate, held at room temperature |
Weighing and dissolving priming sugar
The priming dose is calculated, not eyeballed. The standard figure is 15.195 grams of dextrose per gallon to raise a batch by one volume of CO2, and the actual dose also depends on how much CO2 is already dissolved in the beer, which a priming sugar calculator works out from the warmest temperature the batch reached, not its current, cooler reading. Weighing the sugar on a gram scale rather than measuring it by volume matters here, since a scoop or a cup measurement can vary enough from batch to batch to push a correctly calculated dose into over-carbonation territory.
Dissolve the weighed sugar in a small amount of boiling water, stir until it is fully clear, then let it cool before adding it to the bottling bucket. Boiling it briefly matters for the same reason boiling wort matters: it is a sugar solution and it can carry the same contamination risk as any other unfermented liquid if it sits around raw.
Racking beer onto the sugar solution
Pour the cooled sugar solution into the bottom of the sanitized bottling bucket, then rack the beer on top of it through an auto-siphon rather than the other way around, since the beer flowing in from above mixes the sugar through the batch far more evenly than stirring it in afterward would. A racking cane and hose that reaches close to the bottom of the fermenter, without disturbing the sediment layer, keeps the transfer from pulling trub along with the beer.
Splashing during this transfer introduces oxygen, which dulls flavor and hastens staling in the finished bottles, so a slow, steady siphon aimed to run down the inside wall of the bucket rather than free-falling into it is worth the extra minute or two it takes.
Filling bottles with consistent headspace
A bottling wand with a spring-loaded tip stops the flow automatically once it is lifted off the bottom of the bottle, which leaves a consistent amount of headspace across every bottle in the batch without much thought from the person filling them. That consistency matters because headspace has to be similar bottle to bottle for the carbonation level to come out even across the batch rather than flat in some and gushing in others.
Filling from the bottling bucket spigot directly into the wand, bottle by bottle, is slower than a counter-pressure filler but needs no extra equipment, which is why it remains the standard method for a home-scale batch.
Capping and checking the seal
A bench capper presses a new cap down evenly on a bottle held upright below it, and it is generally easier on the hands and more consistent across a full batch than a hand capper, which clamps one bottle at a time with a squeeze of the handles. Either tool works fine for a normal batch size; the bench capper mainly saves effort once a session runs past a case or two.
Checking a handful of capped bottles by gently squeezing the cap or tipping the bottle upside down over a towel is a quick way to catch a bad seal before it turns into a leaking, undercarbonated bottle weeks later.
Storing bottles while they condition
Bottles should condition somewhere at a steady room temperature, out of direct sunlight, for long enough for the yeast to consume the priming sugar and build carbonation. That timeline commonly runs about two to three weeks for most ale styles, a widely repeated home-brewing convention rather than a fixed number, and it depends on the yeast strain, the beer's alcohol strength and the storage temperature.
Storing the bottles in a closed box or crate during this window is a real safety step, not just tidiness. If a bottle does fail from over-priming or incomplete fermentation, a closed container keeps glass and pressurized beer from spraying across a room, which matters far more than it sounds like it should the one time it actually happens.
Adjusting the process for smaller or larger batches
A 1-gallon or small batch scales the same procedure down: the priming sugar calculation, the sanitizing, and the racking onto the sugar solution all follow the same logic, just with far fewer bottles and a proportionally smaller sugar dose weighed on the same gram scale used for a full batch. Small batches are actually a forgiving place to practice the bottling routine, since a mistake affects a handful of bottles rather than an entire 5-gallon run.
A bigger batch, 10 gallons or more, mostly just multiplies the bottle count and the priming sugar total, though it is worth splitting a very large batch across two bottling buckets rather than trying to rack the whole volume through one bucket and spigot, since a fuller bucket sits heavier and is harder to move without disturbing the sediment settled at the bottom.
Common bottling day mistakes
A handful of repeated habits account for most bottling day problems, and none of them require new equipment to fix, just a different order of operations or a bit more attention at a specific step.
- Bottling on a schedule or an attenuation estimate instead of confirming a stable hydrometer reading first
- Measuring priming sugar with a scoop or cup instead of weighing it on a gram scale
- Splashing during the racking step, which adds oxygen the beer will taste later in its shelf life
- Reusing old bottle caps instead of buying new ones for the session
- Storing bottles loose on an open shelf instead of in a closed box or crate while they condition
Everything else worth considering

Fermtech ProFiller Bottling Wand
Spring tip bottling wand that fills from the bottom and stops when lifted, which keeps oxygen out.

Fermtech Spring Bottle Filler with Tubing
Spring bottle filler supplied with food safe NSF certified tubing.

Stainless Steel Spring Loaded Bottle Filler (14 inch)
Stainless bottling wand with NSF tubing and a cleaning brush, which tolerates hot cleaning.
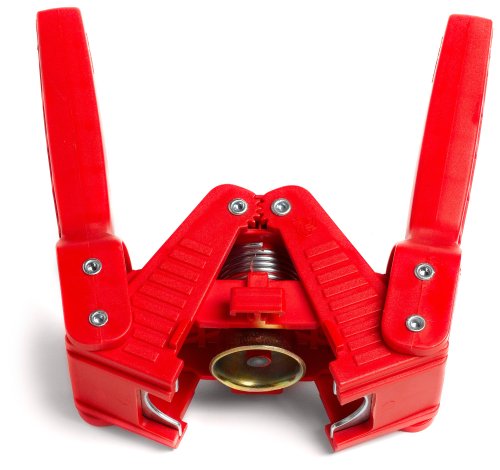
FastRack Red Baron Bottle Capper
Handheld two lever capper for 26mm crowns, the cheapest capper that works reliably.

North Mountain Hammer Bottle Capper
Simple hammer-style capper, slow but nearly indestructible.
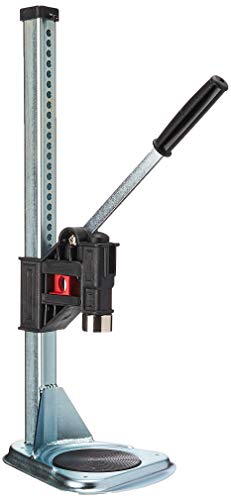
FastRack Colt Strong Bench Bottle Capper
Adjustable metal bench capper that handles both standard and Belgian bottles.

FastRack Amber Beer Bottles 12 oz (24 pack)
Pry-off crown finish longneck amber bottles. Amber glass is what blocks the light that skunks hopped beer.

FastRack Amber Beer Bottles 12 oz (48 pack)
Forty eight amber longnecks, which is roughly what a five gallon batch fills.

Ferroday Bottling Bucket Spigot (2 pack)
Replacement spigots for a bottling bucket, the part that always fails first.

Digital Pocket Scale 200 g x 0.01 g
Hundredth of a gram resolution, which is the precision hop additions and water salts actually need.
Before you do this
Confirm fermentation has actually finished with a hydrometer reading that has not moved across several consecutive days before bottling, and weigh priming sugar on a gram scale rather than measuring it by volume. Store conditioning bottles in a closed box or crate so a failure stays contained rather than spraying glass and beer across the room.
Related on BrewGearCalc
- Why bottles burst and how to prevent it
- A practical guide to priming sugar
- Priming sugar calculator
- Priming sugar reference
- All brewing guides
Frequently asked questions
- How do I know my beer is ready to bottle?
- The only real check is a hydrometer reading that has not moved across several consecutive days. Take a gravity reading, wait a day or two, take another, and compare them. If they match, fermentation has finished. The number of days since pitching and the recipe's stated attenuation are both useful for planning, but neither one actually proves the yeast is done, and bottling on those alone is a common path to over-carbonated bottles.
- How many bottles do I need for a 5-gallon batch?
- A US 5-gallon batch is 640 fluid ounces, which works out to roughly 53 standard twelve-ounce bottles. Real yield usually lands a little under that once trub loss, a hydrometer sample and any bottling bucket residue are accounted for, so most home brewers plan for a couple of extra bottles rather than exactly 53 clean fills.
- Should I weigh priming sugar or measure it by volume?
- Weigh it. The standard priming figure, 15.195 grams of dextrose per gallon for one volume of CO2, is a weight-based constant, and a cup or scoop measurement of sugar can vary enough in packing density to meaningfully change the actual dose. A gram scale is inexpensive, and using one is the single easiest way to avoid turning a correctly calculated priming dose into an over-carbonated or under-carbonated batch.
- Can I reuse bottle caps?
- No. Bottle caps use a thin liner that compresses once against the bottle finish to form a seal, and that liner does not reseal reliably a second time. A cap that looks fine after being popped off can still leak or fail to hold carbonation on a second use. New caps cost very little relative to the ingredients in the batch, so buying fresh ones for every bottling session is the standard practice.
- Do swing-top bottles need a capper?
- No. Swing-top bottles seal with a built-in gasketed ceramic or plastic cap attached to the bottle itself, so filling them skips the capping step entirely. The gasket does wear out over repeated use, and a cracked or hardened gasket is a common source of slow leaks, so checking and replacing gaskets periodically is worth doing on bottles that get reused many times.
- Is it safe to bottle straight from the fermenter without a bottling bucket?
- It can be done by racking directly with an auto-siphon and adding priming sugar solution to the fermenter itself, but mixing the sugar evenly without a bottling bucket's natural stirring action from the transfer is harder, and it risks stirring up sediment sitting at the bottom of the fermenter. A dedicated bottling bucket with a spigot makes both the mixing and the filling noticeably easier to get consistent.
Researched from published brewing formulas, manufacturer specifications and verified owner reviews. This is general guidance, not professional advice.