Guides
Why Bottles Burst and How to Prevent It
Bottles burst for exactly two reasons: too much priming sugar dissolved into the batch, or bottling before fermentation actually finished, and the only real check for the second cause is a hydrometer reading that has not moved across several consecutive days.
The standard priming dose is 15.195 grams of dextrose per gallon for one volume of CO2, and weighing that sugar on a gram scale rather than measuring it by volume is what keeps a correct calculation from becoming an incorrect, dangerous batch.
There are exactly two causes
A bottle does not burst from bad luck. It bursts because too much carbon dioxide built up inside a sealed glass container past what the glass and cap can hold, and that excess CO2 traces back to one of two things: more priming sugar went into the batch than the beer needed, or fermentable sugar was still present in the beer when it was bottled because fermentation had not actually finished. Every home-brewing bottle bomb is one of those two problems, not a mysterious or random event.
Treating the two causes separately matters because the fix for each one is different. Over-priming is a measurement and calculation problem, solved by weighing sugar correctly and using the priming sugar equation with the right temperature. Bottling too early is a verification problem, solved by confirming fermentation is done before any sugar goes in at all.
| Cause | What it looks like | The real check |
|---|---|---|
| Over-priming | More dissolved sugar than the beer needed for the target carbonation level | Weigh priming sugar on a gram scale rather than measuring it by volume |
| Bottling before fermentation finished | Residual fermentable sugar keeps producing CO2 after the bottle is capped | A hydrometer reading that has not moved across several consecutive days |
Why attenuation and elapsed time are not proof
A recipe's stated attenuation is an estimate based on a particular yeast strain fermenting under particular conditions, not a guarantee for your specific batch. Real attenuation shifts with fermentation temperature, pitch rate, wort composition and the specific yeast generation used, so a beer can finish well below or above the number printed on the yeast packaging. Treating that estimate as confirmation that fermentation is done is one of the more common paths to a stuck or still-active fermentation getting bottled by mistake.
The number of days since pitching has the same problem. Most ales finish their main fermentation within a week or two, but that is a typical timeline, not a deadline, and a fermentation that stalled early or is finishing slowly on a cooler-than-expected schedule will still look calm on the outside while gravity keeps dropping underneath. A hydrometer reading that has not moved across several consecutive days is the only check that actually measures whether fermentation has stopped, because it measures the thing that matters directly instead of inferring it from a schedule.
Getting the priming dose right
The standard priming figure is 15.195 grams of dextrose per gallon to raise a beer by one volume of CO2. That number by itself is not the whole calculation, because beer already holds some dissolved CO2 from fermentation, called residual CO2, and the priming dose only needs to cover the gap between that residual amount and the target carbonation level for the style. The standard residual CO2 equation is residual volumes = 3.0378 minus 0.050062 times T plus 0.00026555 times T squared, with T as degrees Fahrenheit.
The temperature that equation calls for is the warmest temperature the beer reached since fermentation, not its current, cooler temperature. Using the current reading instead of the warmest one is a common and genuinely dangerous mistake, because it makes the beer look like it is holding less residual CO2 than it actually is, which pushes the calculated priming dose higher than the beer needs and over-carbonates the batch.
Why weighing sugar matters as much as the equation
A correct calculation still fails if the sugar is not measured accurately, and measuring priming sugar by volume, a cup or a scoop, is exactly how that happens. Sugar packs differently depending on humidity, how it settled in the container and how firmly it was scooped, which means a level cup can hold a meaningfully different weight of sugar from one session to the next even when it looks identical. A gram scale removes that variability entirely and turns the calculation into the actual dose that goes into the batch.
This is not a minor refinement. A calculation that is correct on paper but executed with an inaccurate volume measurement produces the same over-carbonation risk as skipping the calculation altogether.
Containing a failure if one happens
Even a carefully calculated and correctly weighed batch benefits from being stored somewhere that contains a failure rather than exposes it, because a bottle can occasionally have a flaw in the glass itself, or a slightly higher local sugar concentration from an imperfect mix, that a perfect calculation cannot fully rule out. Storing conditioning bottles in a closed box or a milk crate keeps glass fragments and pressurized beer contained if a bottle does let go, rather than scattering across a room, a shelf of other bottles or a person standing nearby.
This is a real safety practice, not an overcautious habit. A bottle failure under full carbonation pressure releases glass at speed, and a closed container is a simple, low-cost way to make sure that energy stays contained instead of becoming a genuine injury risk.
Slowed versus finished: telling the difference
Fermentation activity naturally tapers off well before it actually stops. A slowing bubble rate in the airlock, a krausen that has fallen, and a beer that tastes drier than it did a few days earlier can all show up while the yeast is still working through the last, slower stretch of fermentable sugar, not after it has finished. None of those visual or taste cues mark the actual endpoint, which is exactly why they get mistaken for confirmation.
A gravity reading taken once, on its own, has the same limitation: it tells you where the beer is at that moment, not whether it has stopped moving. Two readings taken a couple of days apart that come back identical are what actually separate a beer that has slowed from one that has genuinely finished, since a still-fermenting beer, even in its slow final stretch, keeps dropping measurably over that kind of interval.
What a stuck fermentation looks like
A stuck fermentation is different from a slow one: gravity stops dropping well above the level the recipe expected, rather than gradually approaching it. This can happen from underpitching, fermentation temperature dropping too low for the strain, or a recipe with more unfermentable sugar than the yeast can handle at the pitched rate. The gravity readings still tell the story, since a stuck fermentation also shows a stable reading across several days, just at a higher number than expected.
Confirming a stuck fermentation rather than one that is simply progressing slowly matters because the response is different: a stuck fermentation may need rousing the yeast, raising the temperature within the strain's range, or pitching a fresh, more vigorous yeast to finish the job, rather than just waiting longer for a fermentation that was never going to finish on its own.
What to do with a suspect batch
If a hydrometer check after bottling shows the beer was still fermenting when it was capped, the safest response is to move the bottles into a closed container immediately if they are not already there, keep them cool to slow any further fermentation, and check pressure carefully before opening any of them, ideally over a sink or outdoors with the bottle pointed away from your face and body. Refrigeration slows yeast activity considerably but does not stop it outright, so a cold bottle from a suspect batch is safer to handle than a warm one, not risk-free.
For future batches, the fix is not a different priming sugar or a different capper. It is confirming a stable hydrometer reading before any sugar goes into the bottling bucket, every time, regardless of how the fermentation schedule looked on paper.
Opening a bottle you suspect is overcarbonated
Chill the bottle thoroughly first, since cold beer holds CO2 in solution more readily and releases it less violently than a warm one when the cap comes off. Set it in a sink or take it outdoors, cover the cap with a thick towel, and point the bottle away from your face and body while loosening it slowly rather than popping it off in one motion, so any excess pressure has a controlled path to vent rather than launching the cap or a spray of beer.
If the cap lifts with unusual force, or the bottle feels harder or more swollen than others from the same batch, treat that bottle, and the rest of the batch with it, as a real overcarbonation risk rather than an isolated fluke, and work through the remaining bottles the same cautious way rather than assuming the rest are fine.
Common myths about what causes bottle bombs
A batch that fermented quickly is not automatically safer than one that took longer, since speed of fermentation says nothing about whether it actually finished, only how fast it got started. Likewise, a beer that tastes fully fermented is not a reliable check either, since taste alone does not detect the small amount of residual fermentable sugar that is enough to over-carbonate a sealed bottle over several weeks of conditioning.
Some brewers also assume that a beer which cleared nicely during cold crashing must be done fermenting, since clarity and fermentation are treated as related in casual conversation. They are not directly linked. Cold crashing drops yeast and haze-forming proteins out of suspension regardless of whether fermentation has fully finished, so a beer can look completely clear while a small amount of active fermentation is still happening underneath.
How this differs from a sealed pressure fermenter
A pressure-rated fermenter is built and rated to hold active fermentation CO2 safely, with a published pressure limit and typically a relief valve that vents excess pressure automatically before it reaches a dangerous level. A capped beer bottle has none of that. It has no relief mechanism, no published pressure rating in the way a fermenter does, and no way to vent gas once the cap is crimped down, which is exactly why the two situations, fermenting under pressure in a rated vessel and conditioning in a sealed bottle, carry such different risk profiles.
Everything else worth considering
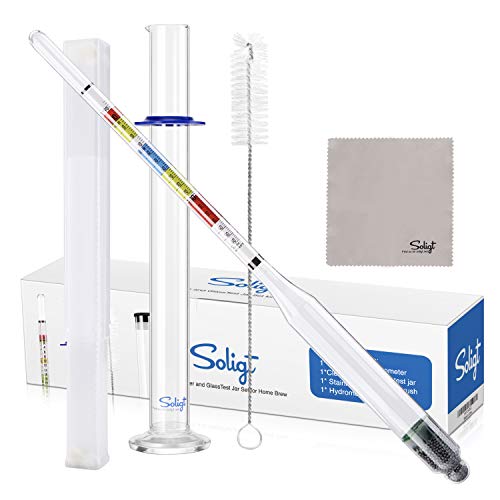
SOLIGT Triple Scale Hydrometer with Glass Test Jar
Hydrometer reading ABV, Brix and specific gravity, supplied with a glass jar.
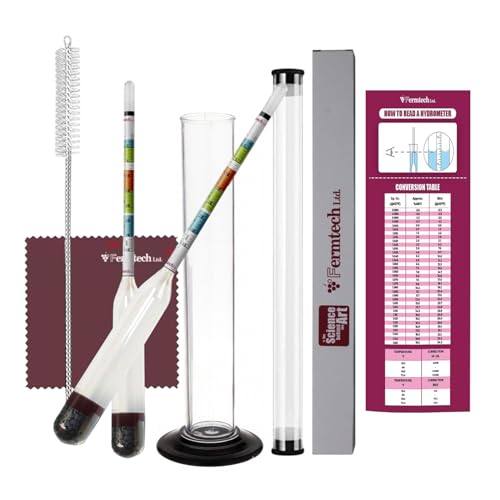
Fermtech Glass Triple Scale Hydrometer Kit
Triple scale glass hydrometer for beer, wine, mead and cider.

Fermentaholics Hydrometer Test Jar
Measuring cylinder for taking a gravity sample without dropping the hydrometer into the fermenter.

Brewing America Glass Hydrometer Test Jar with Brush
Narrow glass flask and cleaning brush, which reads more accurately than a wide vessel.

Brewer's Elite Hydrometer and Test Jar
Triple scale hydrometer with a plastic test jar. Stable gravity on this instrument is the only real proof fermentation has finished.

Digital Pocket Scale 200 g x 0.01 g
Hundredth of a gram resolution, which is the precision hop additions and water salts actually need.

BOMATA 1 kg x 0.01 g Digital Scale
Wider range 0.01 g scale, which covers both salt additions and whole hop packets.
Before you do this
A hydrometer reading that has not moved across several consecutive days is the only real proof fermentation has finished; attenuation figures and elapsed time are not proof. Weigh priming sugar on a gram scale rather than measuring it by volume, and store conditioning bottles in a closed box or crate so a failure stays contained rather than becoming a genuine injury risk.
Related on BrewGearCalc
- A practical guide to priming sugar
- Bottling day, step by step
- Priming sugar calculator
- Hydrometer correction calculator
- All brewing guides
Frequently asked questions
- What actually causes a bottle bomb?
- Exactly two things: too much priming sugar dissolved into the batch before bottling, or bottling before fermentation had genuinely finished, which leaves fermentable sugar in the beer to keep producing CO2 after the cap goes on. Both causes push carbonation past what the glass and cap can safely hold. There is no third mystery cause; every bottle bomb traces back to one of these two, which is also why both are preventable with the right checks before bottling.
- My recipe says the yeast attenuates 75 percent, so is it safe to bottle after a week?
- No, not on that basis alone. Attenuation figures are estimates for a particular strain under particular conditions, and real attenuation shifts with temperature, pitch rate and the specific batch. A week is also a typical fermentation timeline, not a guarantee. Neither number proves your specific batch has finished. A hydrometer reading that has not moved across several consecutive days is the only check that actually confirms fermentation is done.
- Why does the residual CO2 calculation ask for the warmest temperature, not the current one?
- Beer holds more dissolved CO2 the colder it gets, so a cooler current reading understates how much CO2 is already in the beer from the temperatures it passed through during fermentation. Using that cooler number makes the priming calculation think less residual CO2 is present than there actually is, which pushes the calculated sugar dose higher than needed and risks over-carbonating the batch. The warmest temperature the beer reached is the accurate input.
- Can I fix a batch I already bottled if I am worried about over-priming?
- Move the bottles into a closed box or crate right away if they are not already stored that way, and refrigerate them, since cold slows yeast activity considerably even though it does not stop it entirely. Check pressure carefully before opening any bottle from a suspect batch, ideally over a sink or outdoors with the bottle pointed away from your body. There is no way to remove sugar that is already dissolved in a sealed, carbonating batch.
- Is it safer to measure priming sugar with a measuring cup if I do not have a scale?
- No. Sugar packs differently depending on humidity and how firmly it is scooped, so a level cup can hold a meaningfully different weight from one session to the next even though it looks the same. A gram scale is inexpensive and removes that variability, turning a correct calculation into the actual dose that goes into the batch. Measuring priming sugar by volume is one of the most common ways an accurate calculation still produces an unsafe result.
- Do bottle bombs happen with kegged beer too?
- Kegs are pressure-rated vessels with a relief valve, which is a meaningfully different safety picture than a capped glass bottle with no way to vent excess pressure. A keg can still be over-pressurized past safe limits if it is force carbonated incorrectly or a regulator fails, but the venting path a keg has, and a bottle does not, is exactly why bottle bombs are the more common home-brewing failure mode.
Researched from published brewing formulas, manufacturer specifications and verified owner reviews. This is general guidance, not professional advice.