Guides
Cold Crashing Explained
Cold crashing means chilling finished beer down to somewhere around 34 to 38 degrees Fahrenheit for roughly 1 to 2 days so yeast, proteins and hop debris drop out of suspension before packaging.
Because cooling a sealed vessel makes the trapped gas inside contract and pulls a vacuum, the fermenter needs a working airlock or pressure relief valve the entire time, never a fully sealed lid with no relief path.
What cold crashing does and why it works
Cold crashing chills finished beer down close to freezing, commonly cited in the 34 to 38 degree Fahrenheit range, for roughly 1 to 2 days before packaging. That cold temperature encourages yeast to flocculate and settle out of suspension faster than it would at room temperature, and it also speeds up chill haze formation, where proteins and polyphenols bind together and drop out, both of which leave a noticeably clearer beer behind. Those target numbers are home-brewing conventions rather than a published specification, and haze-prone or very hoppy beers sometimes get held longer than a typical 1 to 2 days to clear fully.
In practice, the two things actually dropping out are yeast cells that have finished their work and the protein and polyphenol particles responsible for chill haze, and neither settles instantly even at a near-freezing temperature. A realistic crash runs at least a full day to see a real difference, with most home brewers landing on 1 to 2 days as the point where clarity gains start to level off; leaving a beer colder for a week rarely clears it much further than 2 days already did, since most of the settling that is going to happen has already happened by then.
The trade against leaving beer on the yeast
Cold crashing is a deliberate shortcut. Left alone at fermentation temperature for an extended stretch, most beers also clear on their own over time as yeast gradually flocculates and settles, without any deliberate chilling at all. Cold crashing simply forces that same settling to happen faster, in days instead of weeks, which matters most to home brewers who want to package on a predictable schedule rather than waiting out a slow, room-temperature clarification.
The tradeoff is mainly about time and shelf space rather than beer quality: a beer cold crashed promptly and packaged spends less total time sitting on a yeast cake, which some brewers prefer for delicate, hop-forward styles where they want to preserve fresh aroma rather than risk any autolysis character from yeast sitting too long past its useful life. A beer left longer at fermentation temperature to clear naturally is not worse for it in most cases, just slower to reach the same clarity a short cold crash gets to directly.
The vacuum problem, explained
This is a real accuracy point, not boilerplate caution. Gas contracts as it cools, a basic and well established point of physics, and the headspace gas trapped inside a sealed fermenter is no exception. As the beer and the air above it drop in temperature during a cold crash, the pressure inside the vessel falls, and the fermenter effectively starts pulling a vacuum against the outside air.
That suction has to go somewhere. On a fermenter with a working airlock, it usually just pulls the airlock liquid backward, sometimes far enough that some of it gets sucked into the beer, which is unwelcome but rarely catastrophic on its own. On a vessel that is fully sealed with no airlock and no pressure relief path at all, that same suction has nowhere to go, and it can deform a plastic lid, crack a rigid vessel not built to handle negative pressure, or in a worse case cause it to collapse inward. A fermenter needs a working airlock or a pressure relief valve in place for the entire cold crash, not just at the start.
This is worth restating plainly because it is easy to treat cold crashing as a purely cosmetic step and forget the vessel is under changing pressure the whole time it happens: never seal a fermenter completely tight for a cold crash, never let an airlock run dry, and never assume a lid that looked fine going into the fridge will stay fine coming out of it without a working relief path the entire time it sits cold.
Doing it safely by vessel type
How much this matters in practice depends on what you are cold crashing in. A plastic fermenting bucket usually has a loose-fitting lid that is not fully airtight to begin with, which acts as an informal relief path even before the airlock is considered, though the airlock itself should still stay topped off with sanitizer through the whole crash. A glass carboy with a stopper and airlock needs closer attention, since a well-fitted stopper can seal tightly enough that the airlock becomes the only relief path, and it is worth checking periodically that the airlock liquid has not been pulled entirely into the fermenter, topping it back off if it has.
A pressure-rated conical fermenter, built with a dedicated pressure relief valve for holding carbonation under positive pressure, still needs that same relief path kept clear and functional during a cold crash, since the valve is what equalizes pressure in either direction. Following the manufacturer’s instructions for that specific valve, rather than assuming it behaves like a simple airlock, is the safest approach.
| Vessel type | Relief path | What to watch |
|---|---|---|
| Plastic bucket with lid | Loose-fitting lid plus airlock | Lid is usually not airtight, but keep the airlock topped off anyway |
| Glass carboy with stopper | Airlock or blow-off tube | Check that airlock liquid has not been fully pulled into the fermenter |
| Pressure-rated conical, e.g. VEVOR 15 PSI | Purpose-built pressure relief valve | Follow the valve’s own instructions; it must stay functional in both directions |
Getting the temperature down
A chest freezer or fermentation fridge wired to a temperature controller gives the most control, letting you ramp the beer down over the typical 1 to 2 days rather than shocking it with an instant plunge, which also makes the vacuum event more gradual and predictable rather than sudden. Without dedicated cold space, an ice bath with periodic ice swaps is a workable substitute, though it takes more manual attention to hold a steady temperature.
Fining agents and cold crashing together
Adding a fining agent like gelatin right as a cold crash begins is a common way to speed clarity further, since the cold temperature and the fining agent both work on getting suspended particles to drop out. Dosing and preparation vary by product, so following the specific fining agent’s own instructions is the right call rather than assuming one dose fits every product or every batch size.
Fining agents work by binding to the same haze-forming particles the cold is already encouraging to settle, so the two effects reinforce each other rather than compete. A beer that is only mildly hazy often clears well from cold alone, while a persistently hazy batch, one built from a lot of wheat or oats for example, is more likely to need both the cold and a fining agent together to reach real clarity.
Cold crashing after dry hopping
Cold crashing is commonly done right after a dry hop addition finishes, since the same cold temperature that settles yeast also helps hop particulate matter drop out of suspension, leaving a clearer transfer to the bottling bucket or keg. Running the crash after the dry hop, rather than before, means the beer gets both the aroma extraction and the clarity benefit in the same short window near the end of the process, without adding an extra multi-day step.
The vacuum concern described above applies just the same whether or not hops are in the fermenter, so a working airlock or pressure relief valve still needs to stay in place through this combined step.
Racking off a cold crash: spigot versus siphon
A fermenter with a built-in spigot near the bottom makes racking off a cold crash simple, since the compacted yeast and trub sit below the spigot’s draw point and the clearer beer above it pours out with comparatively little disturbance. A fermenter without a spigot needs an auto-siphon or similar transfer tool, angled carefully to draw from above the settled layer rather than stirring it back into suspension.
Either method benefits from moving slowly and keeping the transfer tube’s intake well above the yeast cake, since a fast, aggressive transfer right at the bottom of the vessel pulls sediment back into the beer and undoes some of what the cold crash accomplished in the first place.
After the crash
Letting the fermenter warm slightly before opening it gives the vacuum inside a chance to equalize gradually rather than releasing all at once the moment a lid is cracked cold. From there, transferring off the settled yeast and trub is the normal next step, whether that means racking to a bottling bucket for priming sugar or transferring to a keg for carbonation.
Common cold-crash mistakes
Most cold-crash problems trace back to the same handful of habits rather than anything wrong with the beer itself.
- Plunging straight from fermentation temperature to near freezing instead of ramping down, which makes the vacuum event more sudden
- Leaving a fully sealed lid with no airlock or relief valve in place for the crash
- Forgetting to top off an airlock after it has been partly pulled into the fermenter
- Racking aggressively from the very bottom of the vessel, which stirs settled yeast and trub back into the beer
- Opening a cold, sealed fermenter immediately without letting it warm slightly first
Everything else worth considering
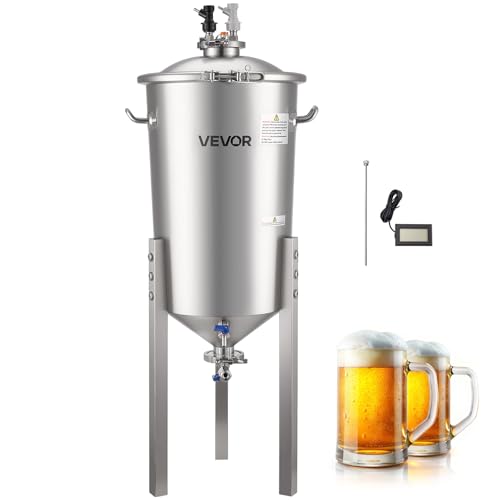
VEVOR Pressure Fermenter 15 PSI (8 gal)
Eight gallon stainless pressure-capable conical, sized for five gallon batches.
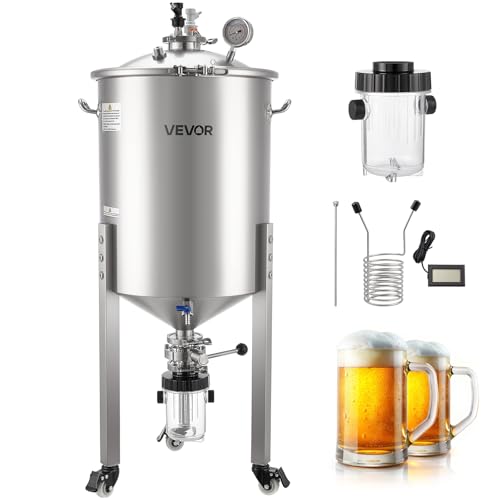
VEVOR Pressure Fermenter 15 PSI (16 gal)
Sixteen gallon stainless conical rated to 15 psi, with a cooling coil and a yeast collection bottle.

FastRack 3 Piece Airlock with Stopper
Three piece airlock and drilled rubber stopper, the part that lets CO2 out and keeps oxygen and bugs from getting in.

Brewland 3 Piece Airlocks with Stoppers (6 pack)
Six airlocks with stoppers and grommets, which is the right quantity once you run more than one fermenter.

Twin Bubble Airlocks (3 pack)
S-shaped twin bubble airlocks, which show activity at a glance.

Inkbird ITC-308 Temperature Controller
Two stage plug-in thermostat that switches a fridge and a heater, which is how most brewers hold fermentation temperature.

Inkbird ITC-308 Freezer and Fermentation Thermostat
Plug-in heating and cooling controller for converting a chest freezer into a fermentation chamber.
Before you do this
A sealed fermenter that is cooled will pull a vacuum as the trapped gas contracts, and that suction can drag airlock liquid back into the beer or, on a vessel with no relief path at all, deform or collapse it. Always cold crash with a working airlock or a pressure relief valve in place, never a fully sealed lid with nothing to equalize against.
Related on BrewGearCalc
Frequently asked questions
- How cold should I cold crash my beer?
- A commonly cited target is somewhere around 34 to 38 degrees Fahrenheit, close to freezing without actually freezing the beer. That figure is a home-brewing convention rather than a published specification, and the exact number matters less than giving the beer enough sustained cold time for yeast and haze-forming particles to settle out before you rack or package it.
- How long should cold crashing take?
- Roughly 1 to 2 days is the typical range, long enough for the beer to reach a stable cold temperature and for most suspended particles to settle. Very hazy or heavily hopped beers are sometimes held longer to clear further. There is no fixed rule here, and checking the beer’s clarity is a better guide than following a strict day count.
- Can I cold crash in a plastic bucket fermenter?
- Yes. A plastic bucket usually has a loose-fitting lid that is not fully airtight, which offers some informal pressure relief on its own, but the airlock should still stay topped off with sanitizer the whole time, since it remains part of the relief path. The main thing to avoid is sealing the lid down so tightly that no air can move at all as the vessel cools.
- Why did my airlock suck liquid backward into the fermenter?
- As the fermenter cools, the trapped gas inside contracts and the pressure drops, pulling outside air, and often the airlock liquid along with it, back into the vessel. This is the normal vacuum effect of cold crashing a sealed container and is the reason the airlock needs to stay filled and functional throughout the crash. If it happens, top the airlock back off; a small amount of sanitizer-diluted liquid pulled into finished beer is unwelcome but not usually a serious problem.
- Do I need to add gelatin or other fining agents?
- No, cold crashing alone clears most beers reasonably well without any added fining agent. Gelatin or a similar fining agent added right at the start of a cold crash speeds clarity further and can help with beers that are especially prone to haze. Dosing varies by product, so following that product’s own instructions rather than a generic amount is the right approach.
- Can cold crashing actually damage my fermenter?
- Yes, if the vessel is fully sealed with no working airlock or pressure relief. As the trapped gas cools and contracts, the resulting vacuum has nowhere to go, and it can deform a plastic lid or, on a rigid vessel not built to handle negative pressure, cause it to crack or collapse. A fermenter needs a functioning airlock or a working pressure relief valve in place for the entire cold crash to avoid that outcome.
Researched from published brewing formulas, manufacturer specifications and verified owner reviews. This is general guidance, not professional advice.