Guides
A Realistic Brew Day Timeline
A typical 5 gallon all-grain brew day runs 5 to 6 hours from heating strike water to pitching yeast, built from roughly 20 to 30 minutes of strike water heating, a 60 minute mash, 20 to 40 minutes of sparging, 15 to 25 minutes to reach a boil, a 60 minute boil, and 15 to 40 minutes to chill wort to pitching temperature.
Why brew day always runs long
Recipe cards list ingredients and timing for the mash and boil, but they rarely account for the time spent heating water, cleaning between steps, or troubleshooting something unexpected. Heating a full kettle of strike water or boil volume takes longer than people expect, especially on lower wattage electric elements or smaller propane burners, and that gap is the single most common reason a planned 4 hour brew day turns into 6.
First brew days on new equipment run longer still, since every step takes extra thinking time while you get comfortable with your specific mash tun, kettle, and chiller. Budgeting extra time rather than a tight schedule keeps a long brew day from becoming a stressful one.
A stage-by-stage timeline
| Stage | Typical duration | Notes |
|---|---|---|
| Heat strike water | 20 to 30 minutes | Depends on burner or element wattage and starting tap water temperature |
| Dough in and mash | 60 minutes | CONVENTION rest length, gives a margin beyond when conversion typically finishes |
| Mash out and sparge | 20 to 40 minutes | Batch sparging is generally faster than fly sparging |
| Heat to a boil | 15 to 25 minutes | A full kettle volume takes longer to reach a boil than a partial one |
| Boil | 60 minutes | CONVENTION length for predictable hop utilization and boil-off |
| Chill wort | 15 to 40 minutes | Immersion chillers are typically slower than plate chillers |
| Pitch and clean up | 15 to 30 minutes | Aeration, pitching yeast, and sanitizing gear for next time |
Extract brew days are shorter
Skipping the mash and sparge steps entirely removes roughly the first two rows of that timeline, which is why extract brew days commonly land closer to 2 to 3 hours rather than 5 to 6. Everything from the boil onward, hop additions, chilling, and pitching, takes the same amount of time regardless of which method got the wort into the kettle.
That shorter window makes extract a realistic option for a weeknight batch in a way a 5 to 6 hour all-grain day usually is not. Brewers with unpredictable schedules sometimes keep an extract kit on hand specifically for this reason, saving longer all-grain sessions for a day with a wider open block of time.
Setup and teardown before the clock even starts
The timeline above starts once strike water goes on the heat, but a realistic brew day includes time before and after that is easy to forget when planning. Gathering ingredients, weighing hops and grain, sanitizing the fermenter and any equipment that touches wort after the boil, and setting up a chiller all take place before the first minute of heating, commonly another 20 to 30 minutes depending on how organized your ingredients already are.
Afterward, cleaning a mash tun, scrubbing a kettle, and rinsing a chiller add another 15 to 30 minutes beyond the pitch and cleanup line already in the table. None of this is wasted time, a poorly cleaned mash tun or chiller is a common source of off flavors or infection in a following batch, but it does mean a brew day that looks like 5 to 6 hours on paper can occupy closer to 6 to 7 hours of a Saturday once setup and full teardown are included.
Brewing with a helper versus brewing solo
A second set of hands changes the timeline more than most equipment upgrades do. One person can monitor the mash temperature and start heating sparge or boil water while the other cleans the previous vessel or measures out the next addition, which overlaps steps that would otherwise happen in sequence. Solo brewers can get some of this benefit by staging tasks in advance, weighing every hop addition into labeled containers before the boil starts so there is no mid-boil scramble to measure anything.
Where a helper matters most is during transfers and cleanup, lifting and moving a full kettle or mash tun safely is easier and faster with two people, and cleanup naturally goes twice as fast when it is split rather than handled by one person after everyone else has moved on.
Where time actually gets lost
A few habits account for most of the gap between a planned brew day and the actual one. Recognizing them ahead of time is easier than fixing them mid-brew.
- Underestimating heating time, especially with a lower wattage electric element or a smaller burner on a large kettle
- A boil-over from an unattended kettle, which costs cleanup time and sometimes a partial ingredient loss
- Not pre-measuring salts, hops, and other additions before the mash or boil starts
- A stuck or slow-draining mash tun that needs troubleshooting mid-sparge
How to shave time without cutting corners
Batch sparging is generally faster than fly sparging since it does not require carefully controlling a slow, continuous rinse. Pre-measuring hops, salts, and yeast the evening before brewing removes a whole category of mid-brew delays. Heating strike water ahead of time, if your schedule allows starting the process earlier in the day, also removes one of the longer waiting periods from the middle of the brew day itself.
No-sparge or full volume mashing, covered in the linked guide below, removes the separate sparge step entirely by mashing with your full water volume at once, which shortens the timeline further at some cost to mash efficiency.
Planning around fermentation, not just brew day
Brew day itself is a single afternoon, but fermentation is the part of the process that actually finishes the beer, and it commonly takes one to three weeks depending on the yeast strain and the gravity of the batch. A calendar estimate is not proof fermentation is done. A hydrometer reading that holds steady across several consecutive days is the real check, since gravity can appear to stall temporarily and then continue dropping.
Building a brew day around a busy schedule
Not every brew day needs to start early in the morning and run straight through. Splitting the process across two shorter sessions works for some brewers: mash and boil on one occasion, chill and refrigerate the wort overnight if food-safe cold storage is available, then pitch yeast the next day once time allows. This is less common than a single continuous session but is a reasonable option when a full 5 to 6 hour block is hard to find.
For most brewers, the simpler fix is starting earlier than feels necessary and building in buffer time between stages rather than scheduling brew day back to back with other commitments. A brew day that finishes with time to spare is far less stressful than one where every stage is racing against a deadline later in the day.
What to prepare the day before
A brew day feels shorter and less stressful when the prior day handles everything that does not require heat or active brewing. Weighing out grain and hops, sanitizing the fermenter and any small parts like airlocks and thermometers, checking that your yeast is at the right temperature to pitch, and confirming your propane tank or electric supply is ready all take a fraction of the time when done ahead rather than squeezed into the actual brew day schedule.
This kind of preparation does not shorten any single stage in the timeline table above, but it removes the small interruptions and searches for missing items that quietly add extra minutes to nearly every stage when they happen mid-brew instead.
A note on kegging versus bottling day
The timeline above ends at pitching yeast, but packaging day at the end of fermentation has its own time cost that is easy to forget when planning a brewing calendar. Bottling a 5 gallon batch, including sanitizing bottles, calculating priming sugar, filling, and capping, commonly takes an hour or more depending on how many bottles you are filling and whether you are reusing bottles that need extra scrubbing. Kegging is typically faster once the keg and lines are already clean, often closer to 20 to 30 minutes for the transfer itself, with the tradeoff of needing kegging equipment in the first place.
Everything else worth considering

Brewer's Edge Mash & Boil Series 2 (no pump)
The same programmable all-in-one without the recirculation pump, which is the single cheapest way into all-grain electric brewing.

BrewZilla Gen 3.1.1 (35L)
The previous generation BrewZilla at a lower price, with the same 35 litre stainless body and step mashing.

Coldbreak 25 Foot Immersion Wort Chiller
Twenty five feet of food grade copper tubing, sized for five gallon batches.

Ferroday 20 Plate Wort Chiller
Compact brazed plate exchanger, the cheapest way into counterflow chilling.

CDN Waterproof Digital Thermometer (4.75 inch stem)
NSF certified waterproof thermometer with a long stem, which reaches into a mash without soaking the housing.
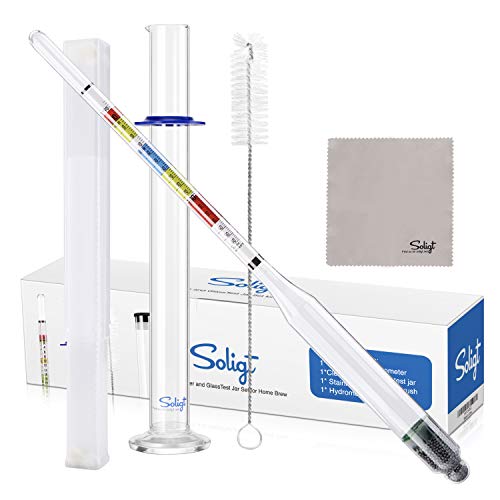
SOLIGT Triple Scale Hydrometer with Glass Test Jar
Hydrometer reading ABV, Brix and specific gravity, supplied with a glass jar.

Inkbird ITC-308 Temperature Controller
Two stage plug-in thermostat that switches a fridge and a heater, which is how most brewers hold fermentation temperature.

Fermtech 24 inch Auto Siphon with Tubing
The standard racking tool: starts a siphon in one stroke without you putting your mouth anywhere near the beer.
Before you do this
If a propane burner is part of your brew day, it belongs outdoors only, never in a garage or basement, because of carbon monoxide. And when the day is done, resist the urge to bottle on a fixed schedule: a hydrometer showing stable gravity across several days is the only real proof fermentation has finished.
Related on BrewGearCalc
- How to brew all-grain beer
- Extract vs all-grain brewing
- No-sparge and full volume mashing
- Boil-off calculator
- Priming sugar calculator
Frequently asked questions
- How long does a 5 gallon all-grain brew day take start to finish?
- Plan on 5 to 6 hours, covering strike water heating, a 60 minute mash, sparging, a 60 minute boil, chilling, and pitching yeast. First-time brew days on new equipment often run longer while you get comfortable with your specific mash tun, kettle, and chiller. Building in extra time rather than planning a tight schedule keeps the day from feeling rushed.
- Why did my brew day take longer than the recipe said?
- Recipe cards usually list mash and boil times but skip water heating time, which varies a lot by burner or element wattage and often runs longer than expected. Cleanup between steps, a slow-draining mash tun, or a boil-over can all add unplanned time as well. None of that means anything went wrong, it is simply time recipe cards typically leave out.
- Is batch sparging faster than fly sparging?
- Generally yes. Batch sparging drains and rinses the grain bed in one or two discrete steps, while fly sparging requires carefully controlling a slow, continuous rinse over a longer period to avoid compacting the grain bed. Batch sparging trades a small amount of potential efficiency for a meaningfully shorter and less hands-on sparge step.
- How much shorter is an extract brew day?
- Skipping the mash and sparge steps commonly brings total brew day time down to about 2 to 3 hours, compared with 5 to 6 hours for all-grain. The boil, hop additions, chilling, and pitching take the same amount of time regardless of method, so the time savings come entirely from not having to mash and sparge.
- When can I bottle after the boil is done?
- Not right after the boil. Fermentation needs to actually finish first, which commonly takes one to three weeks depending on yeast strain and gravity. Check with a hydrometer, and only bottle once the reading holds steady across several consecutive days, since a temporarily stalled gravity can still resume dropping and bottling too early risks over-carbonated bottles.
- Does a bigger burner or element actually save meaningful time?
- Yes, heating time is one of the most underestimated parts of brew day, and a higher output burner or a higher wattage electric element genuinely shortens both the strike water and boil ramp-up stages. The tradeoff is that a stronger heat source also increases boil-over risk if left unattended, so faster heating still needs active attention.
Researched from published brewing formulas, manufacturer specifications and verified owner reviews. This is general guidance, not professional advice.